Ahhhhh! Today is the day! I knew cramming an entire kitchen makeover into six weeks would be tough, but I didn't think I would literally be working up to the last minute! Well, between a week long trip to Louisiana, a few illnesses, and problems with the shiplap and the backsplash, I found myself finishing up at the very last second and taking photos in the dark. BUT, as time consuming and exhausting as it was, I am SO amazed at what our kitchen looks like now. It looks so different than it did before and is finally a space that feels more us and more like home.
Alright, bear with me.. there's a lot of photos, so it may take a while to load! Hang in there!!! ;)
This post is sponsored. See our sponsors further down the page. This post contains affiliate links for your convenience. For more information, see my disclosure policy.
So, in case you need a little refresher of what the kitchen used to look like, here are some before photos. You can also view my week one post for more befores and the story on why we decided to makeover our new-ish kitchen.
Before:
You can also check out my mood board and design plans for the space here.
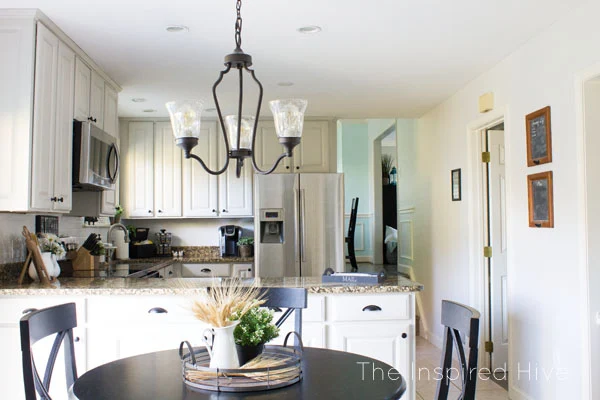
Okay, now for the big reveal! Here's our new farmhouse style kitchen!
Kitchen Makeover Reveal
I can't even believe the difference! It still feels weird walking into this room! It's so light and bright now!
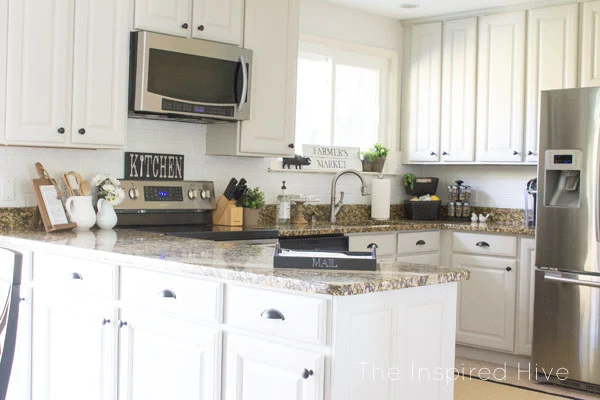
Painting the cabinets with Sherwin-Williams Agreeable Gray made such a HUGE difference (stay tuned for a tutorial on how I painted them quickly next week!). And the new matte black hardware from D. Lawless Hardware is just stunning.
I had my heart set on a brick backsplash, but this faux brick one that only cost us $25 looks just as beautiful as the real thing! I'll be sharing the how to very soon!
In this month's reclaimed wood Monthly DIY Challenge, I shared the tutorial for the "farmer's market" sign.
I found that little pig at HomeGoods, and my son was absolutely tickled with it so we had to buy it for the kitchen of course!
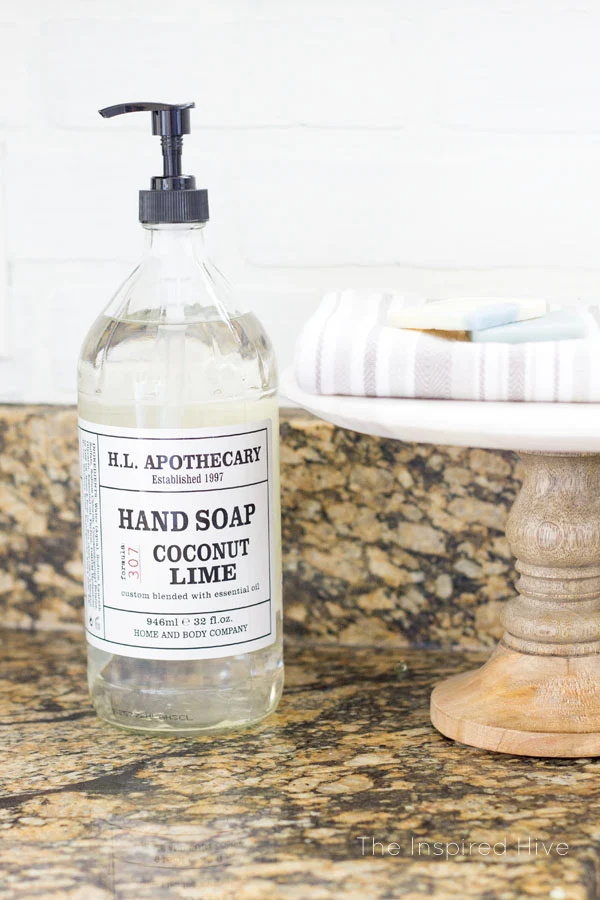
Finding new accessories for the kitchen was so much fun. This apothecary style soap dispenser, the dish towels, and that beautiful cake stand that I couldn't pass up are all Home Goods finds. The handmade soap is from Wild Herb Soap Company.
I focused on easy updates and simple decor and tried to make use of things I already had.
My produce stand from another recent Monthly DIY Challenge also gets to play a part in the kitchen makeover.
This jute rug from Plush Rugs is the perfect addition to the space and hides the ugly square of different tile underneath. Although it wasn't in the budget or timeline to redo the entire floor, hiding that one ugly section with a pretty rug made a big difference! It's also surprisingly comfy with the Anchor grip rug pad from Rug Pad USA underneath!
Okay... now for my FAVORITE part of the whole kitchen.... Ready??
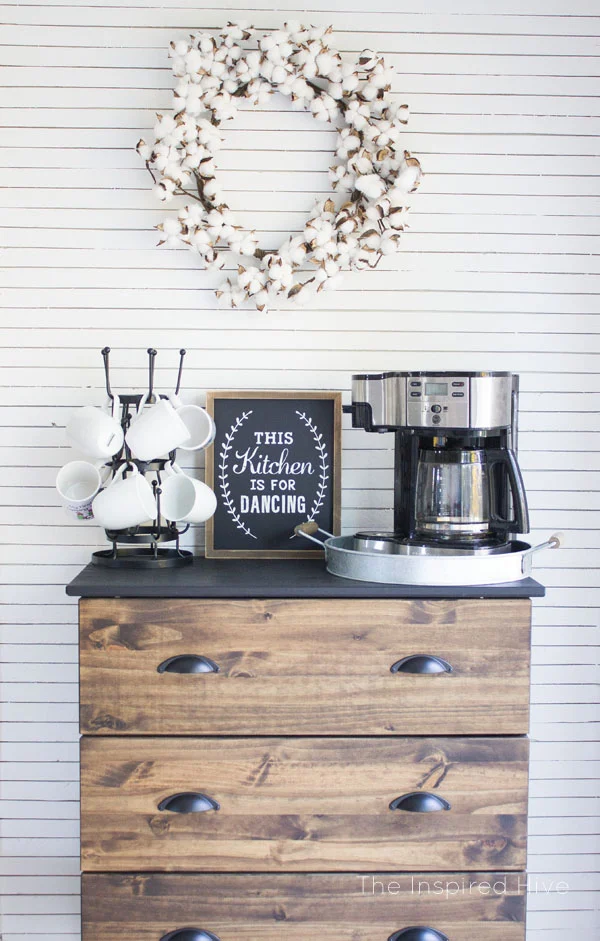
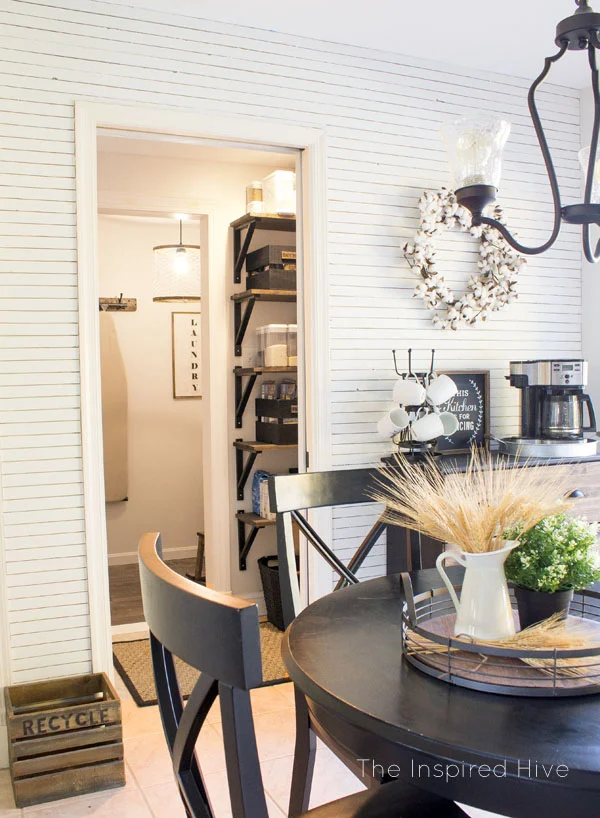
Ahhhhh! Oh my gosh, I am in LOVE with our new skinny lap wall. Let me tell you, it was a pain in the butt, but I am so glad we stuck with it! It brightens up the whole space and adds a nice feature wall. If you're interested in making your own skinnylap wall, I shared the tutorial here.
I also love our new coffee bar that I made using an Ikea Tarva dresser and hardware from D. Lawless Hardware. More details to come!!!
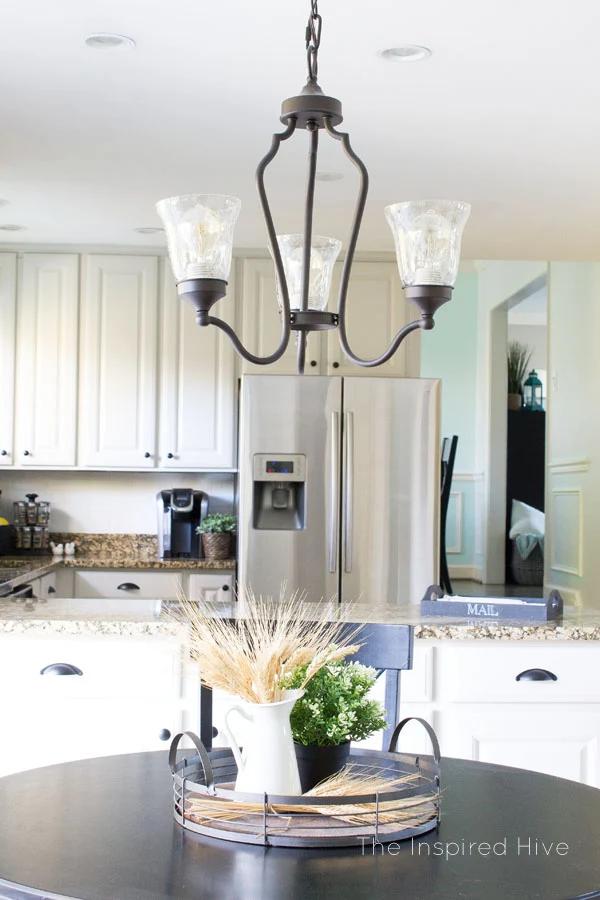
Notice that the chandelier even got a little facelift! I removed the standard shades and replaced them with seeded glass shades along with vintage style bulbs!
This little centerpiece has been hanging out on the table for a long long time. I love the simplicity of it and the natural touches, so I decided to leave it in the new space.
I've had that little recylcing bin for a couple of years too. I found it at Home Goods, but it would also be an easy DIY.
And let's not forget the view of the pantry and laundry room. Now that the kitchen, pantry, and laundry room are all three totally completed, I feel like I can finally breathe again! It's been a long haul and hard work, but I love how they finally all flow together.
Well, what do you think? I am so in love and so glad we took this huge commitment on! So worth it!!!
Okay, just one more....
Let's take a look at our original to do list again:
Cover the bright blue paint with a neutral color(SW Eider White)Paint cabinets(SW Agreeable Gray)Change cabinet hardware(Flat black knobs & pulls)Install and paint skinnylap wall(SW Alabaster)Install and paint faux brick backsplash(SW Alabaster)Create a coffee barHide ugly tile pattern in the middle of the floor with a pretty rugUpdate current light fixture without buying a new oneBuy/create wall art and decor
As you can see, we actually tackled our whole to do list! There are still a few small things I would like to do, like touching up the paint on the inside edge of the cabinets and finding some large art for the long wall near the dining room and maybe a few other accessories. But for the most part, I couldn't be happier with all that we accomplished! I am in love with our new space!
I think my favorite part of the process was while I was sprinting around decorating and my husband said, "Do you feel like Joanna Gaines on the night before the reveal when she's staging the house?" Why yes, honey, yes I do. ;) Man, does he know how to speak to my heart!
We are so thankful for our amazing sponsors for the One Room Challenge! Check back over the next couple of weeks for detailed tutorials from our kitchen makeover with some of these fabulous brands!
Interested in where I found some of the items in the kitchen? Check out the sources below!
Product Sources:
- Cabinet Paint- Sherwin-Williams "Agreeable Gray" (See the tutorial!)
- Cabinet hardware- D. Lawless Hardware (knobs | pulls)
- Backsplash- Faux brick panel with Sherwin-Williams "Alabaster"
- Produce baskets- DIY tutorial
- "Farmer's Market" Sign- DIY tutorial
- Pig figurine- Home Goods
- Faux plants- IKEA
- "Kitchen" sign- Home Goods
- Cutting board recipe stand- Hobby Lobby
- White vases- Home Goods
- Mail tray- DIY tutorial
- Jute rug- Plush Rugs with rug pad from Rug Pad USA
- Table and chairs- Overstock
- Light fixture- Overstock with seeded glass shades and vintage bulbs
- Coffee bar- IKEA Tarva dresser + D. Lawless Hardware (tutorial coming soon)
- Coffee maker- Hamilton Beach
- Keurig 2.0- Amazon
- Mug rack- Amazon
- Mugs- Bed Bath & Beyond
- "This kitchen is made for dancing" sign- Hobby Lobby
- Cotton wreath- Flora Decor
- Skinny lap wall- DIY tutorial
Don't forget to stop by Calling It Home to view the rest of the Guest Participants' room makeover reveals!
Check out the rest of my One Room Challenge kitchen makeover posts:

*This post may contain affiliate links. See my full disclosure policy.










Nicole it looks so good! That shiplap wall is a total show stopper and the whole room looks completely different! I love it!!
ReplyDeleteThanks so much, Bre! The shiplap wall is my favorite part! <3
Deletewow, you have a beautiful kitchen, you did so much work in less than 6 weeks!
ReplyDeletethe coffee station is a great addition, especially the cool wall
Thanks, Morgane! Coffee is an important part of life around here! ;)
Deletewhat a pretty kitchen! i love all of your rustic wood touches!
ReplyDeleteThank you, Cassie! I'm a lover of wood tones for sure!
DeleteOh my goodness! It's SO beautiful! SO much lighter and brighter and I love that skinnylap! It's perfect Nicole!
ReplyDeleteThank you, Kristi!!! It really is SO much brighter and homey feeling now!
DeleteHow gorgeous is this transformation?! Seriously swooning!! And that skinnylap!!! I just adore it all! Excellent job!!
ReplyDeleteThanks, Jennifer! It really is such a huge transformation! The skinnylap is my favorite part!
DeleteYou did such a good job! It looks so much brighter now! And I love the skinnylap so much!
ReplyDeleteThanks, Emily!!! The skinnylap really makes the space!
DeleteIt's absolutely beautiful! So charming! I love a fresh white farmhouse kitchen, and you've created a completely beautiful and rustic casual space to enjoy!! Great job!
ReplyDeleteThank you so much, Krista! It feels so much lighter and brighter now! :)
DeleteYou guys did an amazing job, Nicole! That shiplap was is such a pretty backdrop for your coffee station! And the back splash is beautiful! You'll You'll be You'll be so You'll be so glad you got it completed so you can enjoy it for the holidays!
ReplyDeleteThanks, Kendra!!! And I am SO glad it's done before the holidays!!! :)
DeleteAbsolutely beautiful! You got a LOT done in six weeks!
ReplyDeleteThanks, Amanda! It was a busy six weeks, for sure!
DeleteLove your shiplap wall !!Beautiful transformation !!
ReplyDeleteWould love your opinion nTIA
http://lakbirdesign.blogspot.com/2016/11/one-room-challenge-kitchen-remodel-week.html
Thank you!
DeleteSkinnylap! Love it. It really looks like old large walls. Our home was built in 1910 and that's exactly what the "guts" of the walls looks like.
ReplyDelete*lathe walls
DeleteThank you! That's awesome! That's what we were going for! I SO wish I had an early 1900s home too though!!! <3
DeleteWell done Nicole - Your kitchen makeover is fabulous! The skinny-lap puts this space over the top!
ReplyDeleteVicki and Jenn
2 Bees in a Pod
Nicole, I love your skinny-lap wall and everything else you did to your kitchen!. You guys worked your butts off to finish in 6 weeks; and the pig is darling!
ReplyDeleteWhat a transformation! You did such an amazing job- I am completely inspired. Just darling!!
ReplyDeleteThis is so gorgeous!!! The skinnylap wall with your adorable coffee bar is my favourite! I also love the farmhouse touches you added like that cute wood sign you made and the little pig! Your husband is right - Joanna Gaines would be proud!
ReplyDeleteIt looks great! Th skinnylap wall is amazing. I've actually never seen it "skinny" style and I love it.
ReplyDeleteOh my gosh it's stunning!! That skinnylap wall is definitely a show stopper. It's so much lighter and brighter than before. The backsplash is so fun, too!
ReplyDeleteYou stole my heart with those cabinets. What a difference! Such a lovely space, and I love your sign "This Kitchen Was Made For Dancing". And I am absolutely sure you were channeling your inner Joanna Gaines... so nice of your husband to notice :)
ReplyDeleteWow, absolutely gorgeous Nicole!!! Love the cabinets, the coffee station and that skinny ship lap wall! Great job!
ReplyDeleteCan I just say WOW...that is beautiful and job well done. You accomplished a lot for only 6 weeks!!
ReplyDeleteAwesome reveal. That shiplap wall and coffee corner is simply my favorite.
Thank you so much Lauren!!! The skinny shiplap and coffee bar are by far my favorite parts too!!! :)
Delete