How we made a DIY table to custom fit our built in bench
When we first toured this house before buying it, one of the highlights was all of the custom features. Not only did it have tons of old house charm, but it had lots of custom built-in shelves, and the cutest little built-in breakfast nook! I always thought having a bench in the kitchen would be so cozy, so it was a dream to move into a house that already had one! However, we quickly found that the breakfast nook wasn't working very well for our family. We needed to make a change!
This post is sponsored by HomeRight. As always, I only promote products that I love and think you will too.
This post contains affiliate links for your convenience. For more information, see my disclosure policy.
This post contains affiliate links for your convenience. For more information, see my disclosure policy.
You might also love...
- Vintage farmhouse kitchen design plan
- Modern farmhouse kitchen makeover
- Our first Pocket Hole Jig experience
We have two toddlers, a one year old and two year old. One of them is still eating in a high chair, and the other is in a booster seat.
As most toddlers are, they are very messy when they eat! When we moved in, we decided to eat most of our meals in the kitchen instead of the dining room so that they would only ruin one floor during the toddler years 😉
Because they are still in toddler seating, they sit on one side of the table and my husband and I sit on the bench. Typical parents, we get up every two minutes during dinner because someone needs more food, another napkin, dropped their fork, needs ketchup, etc.
We quickly learned that those table legs were not good for getting in and out of the table. We have to push the table away from the bench to get out, but we can't push it because the kids are in seats on the other side. So we usually manage with a lot of acrobatic work. 😂
The other downside of the table was that it was shorter in length than the bench. If we have guests over for a meal, there is hardly enough table space for anyone else. After searching everywhere for a table that would work for us, we realized we needed a custom size.
Materials
- Lumber (order online for in store pick up 🙌)
- (3) 1x6x12 Poplar boards
- (2) 1x2x8 "common board" or pine
- (1) 1x3x8 "common board" or pine
- 4x4 post (All our store carried was cedar. Make sure it is not pressure treated)
- 5/4x4x8 premium pine board (Ask in store. Online all they have is the common board version)
- Circular saw (a miter saw or table saw would be helpful too)
- Kreg Pocket hole jig
- Drill
- Pocket hole screws (we used 1.5" and 2")
- Screws (we used 1-1/4" and 3" screws)
- Wood glue
- Brad nailer
- Brad nails (we used 1.25")
- Fine sand paper
- Tack cloths
- HomeRight Finish Max sprayer
- Stain (I used Minwax "Special Walnut")
- Stain cloths
- Clear top coat
- Sponge brush
How to build a custom farmhouse table
Today I am going to share with you how we built and stained our table. Please note, we are not professionals and are still fairly new to furniture building, but I want to share our experiences. Our first build was our playroom toy shelf and we have learned a lot since then!Below I have photos showing you everything put together and I will walk you through the steps we took for a custom sized breakfast nook.
Above is our tabletop upside down so that you can see the placement of the pocket holes (sorry for the terrible photo- it rained for weeks on end here and finding a bright spot for a photo was tricky!)
We used poplar for the top. I knew from experience that cheaper pine boards were not a hard enough wood to be used around children. It is soft and will dent and scratch easily. So we opted for a more expensive hardwood that could handle the wear and tear of a kitchen and children.
We cut five pieces of 1x6 poplar down to 58" (Adjust your length for your bench size. Remember to add the width of the two end boards) and used our pocket hole jig to pull them together nice and tight. Using pocket holes will give you a professional looking piece of furniture with super strong joints. I highly recommend this pocket hole jig if you are just starting out.
See this post for more details on how to use a pocket hole jig.
We spaced the holes approximately every six inches as recommended by Kreg and placed the holes along one side of four of the boards. The end board will not need holes.
After the pocket holes were drilled, we used our square #2 driver bit and a drill to drill the 1-1/2" pocket hole screws into the holes. Screw size is determined by wood thickness, and Kreg includes a handy chart in their jig kits to help you determine what size you need.
Then we cut two 1x6 pieces of poplar to 28" for the end pieces. We made two pocket holes for each of the five long boards and screwed them into the ends of those boards.
We made a simple frame under the table for added support and to keep the boards from warping. We cut two pieces of 1x3 pine boards to 24" and one to 21" and two pieces of 1x2 to 56". We layed them out in a rectangle and centered them, added the center support to the middle, and screwed them in with 1-1/4" screws.
For the legs, we measured the height by having one of us sit on the bench and finding a comfortable height. Our previous table was too short for the tall bench. If you have a standard bench height of about 18" then you can safely use a standard height of 30".
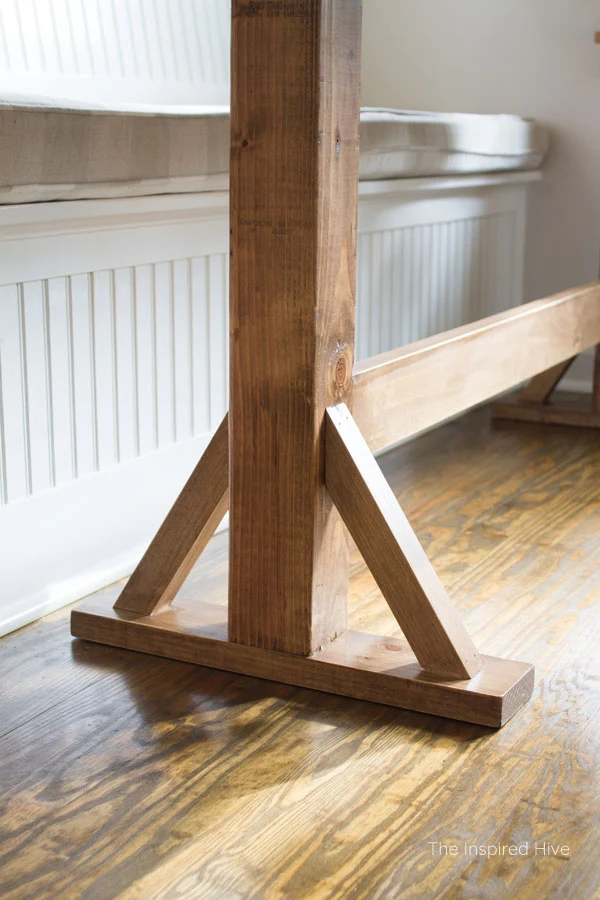
We cut the 4x4 post into two pieces 28-1/4" tall to give us a total height of 30-3/4". For the table foot, we cut the 5/4 board into two 18" pieces. We measured and marked the center and screwed one to each 4x4 post from the bottom using three 3" screws.
Then we cut four 1x2s per leg for the angled support pieces. We set the angle on our circular saw to 30 degrees and carefully cut the angled pieces. If you have a table saw or miter saw, I would recommend that over this method for a more precise cut. But we used the tools we had readily available. (A table saw is on my Christmas list 😁)
We used wood glue and clamps to attach two 1x2s together to create a thicker, square support piece. Once they were dry, we used 1-1/4 inch brad nails and our brad nailer to attach them to the foot and the 4x4.
To provide more support, we cut a 46" piece of 5/4 board and put two pocket holes in each board. We attached it to each leg at 7" from the floor. We used 2" pocket hole screws.
Then I sanded everything really well with 400 grit sandpaper to get a nice smooth finish. I rounded all of the edges and sharp corners. Use a tack cloth to clean all sanding dust before staining.
How to stain with a sprayer
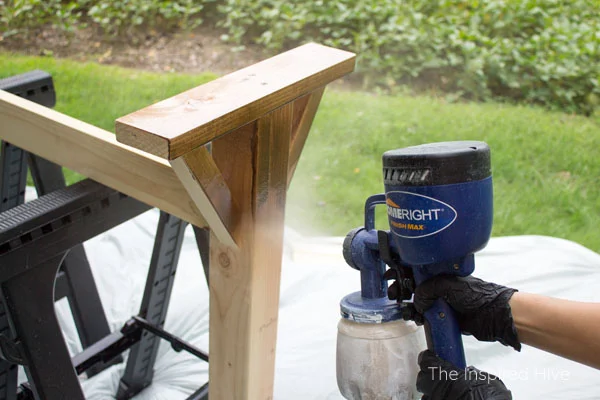
I use my HomeRight Finish Max paint sprayer for everything because it gives such a professional looking finish. It's one of my favorite DIY tools (in case you couldn't tell by all of the paint on it from years of use!). But I had never used it for staining!For some reason, I thought putting an oil based stain in it just sounded like a big mess. But in an effort to save time since I'm busy chasing two little munchkins and working on a kitchen renovation, I decided to try staining with my sprayer.
Y'all. Why didn't I try this sooner?! It was so easy!
To make staining easier, I left the tabletop and legs separate. I put the legs upside down on two sawhorses.
The best part about putting stain in a sprayer is you don't have to thin it!!! With paint, you have to add water to get it to the right viscosity, and it can take some time to get it just right. But stain is already so thin, you just pour it right in!!!
Notice below, I only poured about an inch deep of stain into the sprayer. A little goes a long way.
Always do a practice spray on some scrap wood or cardboard so that you can adjust your spray. Because stain is so thin, turn the knob under the handle all the way to the finest spray setting and then adjust from there.
I sprayed one leg at a time, starting with the foot and working my way down the leg. The sprayer was perfect for getting behind those bottom support pieces.
The stain will drip a bit (gravity!) so have some staining cloths on hand to wipe away excess stain immediately after spraying each leg. My method was: spray a leg, wipe, spray center support, wipe, spray other leg, wipe.
To spray the long middle support piece, I sprayed down at an angle to get the bottom and one side at the same time. Then the other side. Then upwards to get the underside. Slide the whole table a bit to get the parts resting on the sawhorse.
Once the legs are dry enough to move from the saw horses, you can put the table top on top of them. If you are short like me, you may need a step stool or ladder to get an even spray from above. Start on the bottom of the table and then the top. Again, be ready to wipe excess stain right away to get a nice even color.
To clean the oil based stain out of my sprayer, I ran some paint thinner through it and then wiped it all down with a rag soaked in paint thinner. It was quick and easy cleanup.
After the stain has dried, coat everything in a clear coat. I decided to use General Finishes High Performance Top Coat because it will withstand the power of my kiddos 😁 We used it on the playroom shelf and it still looks great a year later.
I brushed on three coats with a sponge brush and sanded lightly in between coats. Use a tack cloth to clean the sanding dust. On the top of the tabletop, I did five coats for extra protection. Be sure to allow the top coat to cure fully before using the table.
Once the top coat was finished, we attached the tabletop by screwing a square block of scrap poplar into the top of the 4x4, and then screwed the block into the tabletop.
If you don't like all the pocket holes on the underside, you can buy wooden pocket hole plugs to stain and put into the holes. I didn't worry about it on the bottom of the table but did use some on the bottom support piece.
Our farmhouse breakfast nook
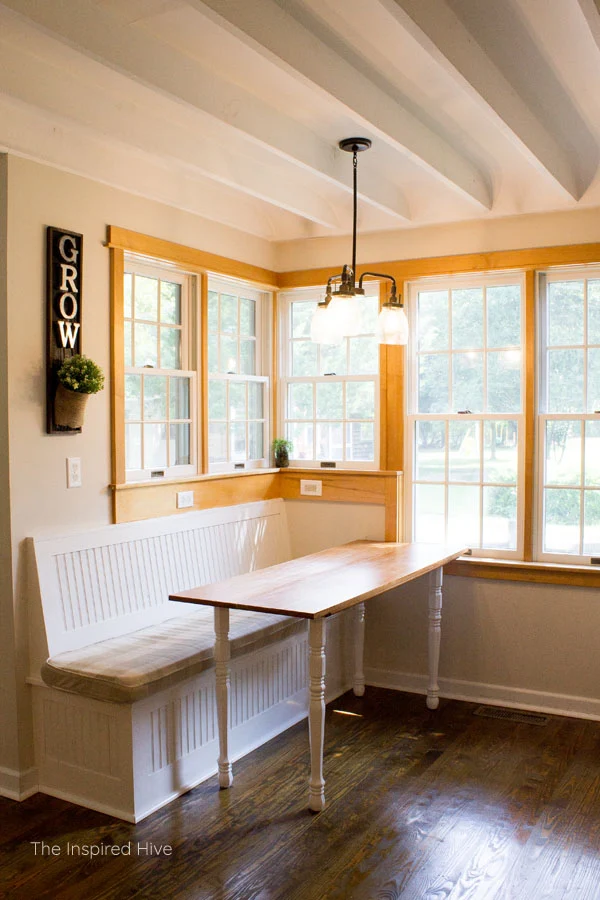
Overall, we are in love with our new table so far! It fits the space much better, it's tall enough that we don't have to lean over when we are sitting on the bench, and we can easily slide in out of the bench since the leg is centered instead of at the base of the bench! 🙌Staining with the sprayer was a breeze, and I will definitely be using it for staining in the future.
Just look at that pretty finish! 😍
I can't believe we were able to build our own kitchen table and it actually turned out sturdy enough with a beautiful finish. If I can build a table, you can!
There are a lot more changes to come in this little nook. Make sure you're following along to see all of our kitchen updates for the One Room Challenge!!!
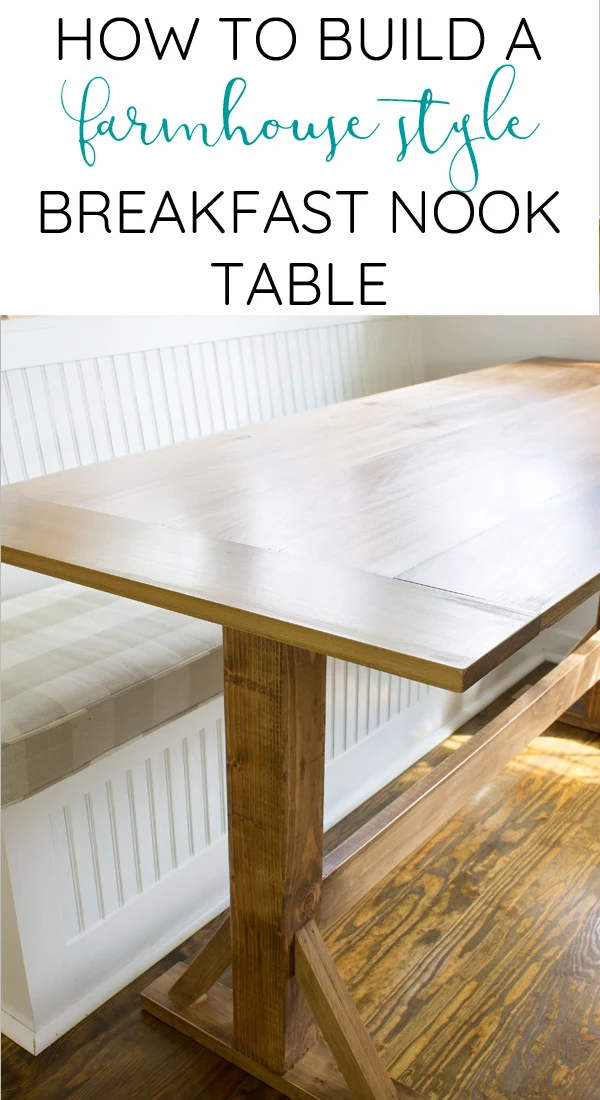
Pin it for later!










No comments
Post a Comment