This post is sponsored by HomeRight. I only promote brands and products that I love, and all opinions are always my own.
This post also contains affiliate links for your convenience.
For more information, see my disclosure policy.
Materials:
- Scotch Brite scouring pads
- Soft cloth
- Painter's tape
- Primer
- High quality enamel paint (We used Sherwin-Williams ProClassic Waterborne Acrylic Enamel)
- High quality paint brush (We used the Purdy XL Cub)
- Sponge brush
- Paint Sprayer- HomeRight Finish Max Fine Finish Sprayer
- HomeRight spray shelters (large | small )
Alright, ready for your seven day break down? This is going to seem like a lot of info at once, but I promise, it's really not that complicated, and taking the right steps will give you the results you were looking for and an amazing "new" kitchen! First let's take one last peek at our kitchen's "before" shot, and then we'll dive into the plan of attack.
Day 1- Prepare the cabinet surfaces
Use the first day to get everything ready for painting. Kitchens are dirty, greasy places, so you need to make sure your cabinet surfaces are clean. I used a little warm water and dish soap on greasy areas, but I have also heard that others use acetone, Krud Kutter, or TSP cleaner. Then you need to scuff up the surface to give the paint something to adhere to. If you have a really glossy surface, you may need to do some real sanding and use a finish stripper or deglosser. Our finish wasn't very shiny, so we just used some green Scotch Brite pads to slightly strip the surface and to remove any extra grime that we missed with the dish soap. After "sanding" with the Scotch Brite pad, we used a wet cloth to remove all of the dust.
Next, remove all of the cabinet doors and drawer fronts. Use small pieces of painter's tape on the front (yes, the front!) of each piece to number them and keep them in order. We placed the screws for each drawer inside of the corresponding drawer to keep them from getting lost (tape them down inside of the drawer if you're extra worried!). We placed the cabinet hinges on the countertop directly above/below the corresponding cabinet with the screws in the hinge. We did have to move them around the countertop throughout the process because life still goes on in the kitchen, but we were careful to always keep them lined up in the correct order. You could also use painter's tape here and number the hinges if you're worried about mix ups.
Don't forget to tape off any areas that you might accidentally paint! I just taped along the base of the cabinet frames on the tile.
Day 2- Prime the cabinet frames
I used a high quality paint brush to hand prime the frames. It's important to use a good brush to help avoid seeing brush strokes or shedding brush hairs into your paint. I separated everything into sections, brushed one whole section, and then went back over each area with one long stroke while the paint was still very wet to further minimize brush marks. Priming the frames went fairly quickly and primer dries faster than paint, so you can squeeze a second coat of primer in on day two as well.
The most annoying part of the entire process is the small inside edge of the cabinets. Thankfully, nobody will see that part but you, so if you're like me, you can let it drag out a little bit and save it for last 😉 I used a sponge brush to prime the inside edge. The sponge made it go quickly. If I'm being perfectly honest, I didn't end up doing the actual painting of the inside edge until the rest of the kitchen was done... because, well... priorities! Since that part isn't seen on daily basis, I didn't feel rushed to push it to the top of the to do list. But since primer dries quickly, I did go ahead and do that at the same time as the rest of the primer.
Day 3- Spray prime the doors/drawers. Paint the frames.
Prime the doors and drawers:
Get ready to spray prime the doors and drawer fronts. I set up my HomeRight Spray Shelter and Tabletop Spray Shelter in the garage. These shelters are fantastic and serve two purposes for me. If I'm painting outside, they keep debris and bugs from blowing into wet paint, or if I'm painting in the garage, they keep paint overspray from getting everywhere. I chose to paint in the garage for this particular project because I knew the whole process would take several days and I didn't want to have to take down the tents every day (because outside there would be dew in the tents if I left them up overnight), but if you don't have a garage, you could still easily make use of the tents outside!
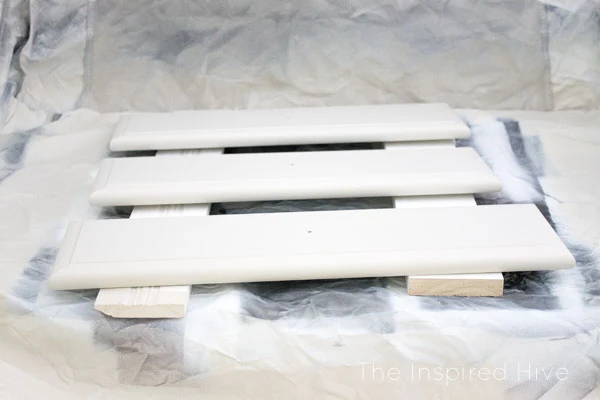
We laid a big plastic drop cloth under the large spray shelter, and placed some 2 x 4 boards and scrap wood pieces down to elevate the doors off of the ground. We placed the tabletop shelter on an old countertop we have in the garage and placed some additional scrap wood in it. We used the large spray shelter to lay out the doors and used the tabletop shelter for the drawer fronts. They could not accommodate all of the drawers and doors at once, so as they dried we carefully switched them out.
Then we used our HomeRight Finish Max Fine Finish Sprayer to spray prime all of the doors and drawer fronts. Read the can to see if there are any specific instructions for diluting your particular primer for spraying. If there aren't any, follow the suggested run out times in the sprayer manual. The point is to get the primer (or paint) thin enough that it will spray smoothly without clogging the sprayer. Trust me, you will know if it is too thick! The sprayer will clog and spray chunks of primer/paint. Always do a test spray on some scrap wood before spraying your project so that you can make adjustments if needed. It's also important to stop at the end of each stroke of spraying for an even coat. The manual gives more details on how to do this.
We sprayed all of the backs first, and once dry, flipped them over, moved the tape number, and sprayed the fronts. This way, we didn't risk scuffing up the fronts once they were primed.
Paint the frames:
While your doors and drawers are drying, start painting the cabinet frames in the kitchen. Again, using a high quality brush and smoothing out your strokes at the end of each section are important for reducing brush marks. Using a quality self-leveling enamel paint will also help in achieving a smooth finish. We used Sherwin-Williams ProClassic Waterborne Acrylic Enamel. This paint acts like an oil based paint without the messy clean up. It dries slowly enough that the paint has time to level out and fill in most brush marks. Once cured, it also creates a tough, durable surface which is perfect for a highly used area like a kitchen. This paint is thick, so watch for drips in the first few minutes as it begins to self-level.
Day 4- Repeat day three
Spray a second coat of primer on the doors and drawer fronts. Brush on the second coat of paint on the cabinet frames in the kitchen. Now the frames are done and have a few days to start curing before you reattach everything.
Day 5- Paint the doors and drawer fronts
Prepare your paint for the sprayer. We started with a 50:50 combination of water and Floetrol, adding the amount of mixture based on the directions on the can. Floetrol is a paint extender that reduces brush marks and prevents clogging of paint sprayers. Since this is a thick paint, I wanted to take that extra step ensuring no issues with the sprayer. After adding our water/Floetrol mix, we continued to add water until we achieved the proper run out time. However, once I did my test spray, it was obvious that it was still slightly too thick, so we added a little more water, and tested again. Reminder- always do a test spray first!
Again, spray the backs first, and then, once dry, the fronts. That way you aren't putting the freshly painted fronts face down and risking messing them up. As you are spraying, the enamel paint might look a little bumpy, and you might feel worried at first. Remind yourself, you're using a good self-leveling paint, and it will turn out perfectly smooth in the end! After it dries, if you do have any bumpy or bubbled areas, you can do a light sanding before the next coat. The only issue I had with bubbling was one piece that I didn't realize was sitting in the sun. The heat made the paint bubble up, and I had to sand it before moving on to the next coat. Otherwise, an impressively smooth finish all around!
Day 6- Repeat day five
Respray all the cabinet doors and drawers with paint. Pay close attention to the edges and any missed areas since this is your last chance to fix them! Let dry overnight.
Day 7- Reinstall
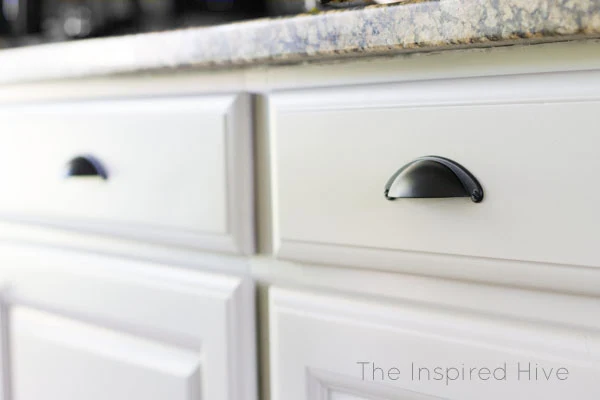
Carefully reinstall the drawers and drawer fronts. Install your hardware. We used these beautiful matte black knobs and cup pulls from D. Lawless Hardware. They are a great source for affordable and gorgeous cabinet hardware! When reinstalling, remember that the paint has not fully cured yet, so do your best not to bump or scratch the paint!
That's it! Your kitchen is back together in just seven days! Now, the hard part is just being extra careful with your cabinets for the next month or so. Be gentle closing the doors/drawers and try to avoid bumping into or spilling on the fresh paint. If you are careful and allow the paint to fully cure over the next few weeks, you will have a nice durable finish that should last for years!
Now, wasn't that easy? I really think the paint sprayer is what makes it go so quickly. If I had hand painted all of the doors and drawers, it would have taken a lot longer, and the finish wouldn't be nearly as perfect. At such an affordable price, the paint sprayer is well worth the cost of saving time and getting a beautiful result.
I absolutely love how our cabinets turned out. We chose Sherwin-Williams "Agreeable Gray" which is a perfect light gray. It's light enough that it almost looks white without showing all of the dirt that white does, and it's just dark enough to add a little bit of color and contrast to the kitchen. The black hardware really pops against the gray! We went from a dark cherry kitchen to a light and bright modern farmhouse kitchen. I couldn't be happier with the difference a little paint made!


No comments
Post a Comment