If you caught our laundry room reveal this week, you might have realized something is missing... where's the pantry I've been talking about that goes along with knocking out all those walls?! Today, you get a little sneak peek! The pantry is just about done too, but I have a couple of projects I want to share with you first! Today, I'm sharing our new DIY pantry organization! I'm so happy with how our rustic wooden storage crates turned out!
The lovely folks at Walnut Hollow provided product for this post.As usual, all opinions are my own, and I only share products with you that I loveand think you will love too!
This post also contains affiliate links for your convenience. Please see my full disclosure policy.
Since the new pantry flows into our new rustic-industrial laundry room, I wanted the pantry to have a similar rustic feel. I also wanted it to be very organized because living out of a couple of small kitchen cabinets for three years has made cooking a frustrating experience! I wanted a specific place to put everything so there would be no more digging around for what I need. Wooden crates fit my vision perfectly! They are versatile enough to look rustic and can be easily organized with some labels.
I decided that wood tones and black paint would help pull the look together to blend in with the laundry room. Then, it dawned on me that wood-burned labels could be the perfect rustic touch and could look really cool! I had only done a few wood burning projects in the past, but it was easy enough that I thought it could work for the crates... and I seriously couldn't be more thrilled with how it all turned out!!! It was so easy to do and is the perfect organizing idea! If you haven't tried wood burning yet, you need to!
Materials:
-Walnut Hollow rustic crates (I used 4 sets of nested crates which includes 4 small/4 large)-black spray paint (I used Rustoleum flat black spray paint)-small wood slats-wood stain (I used Minwax "Dark Walnut")-wood burning tool-HotStamps alphabet set-super glue
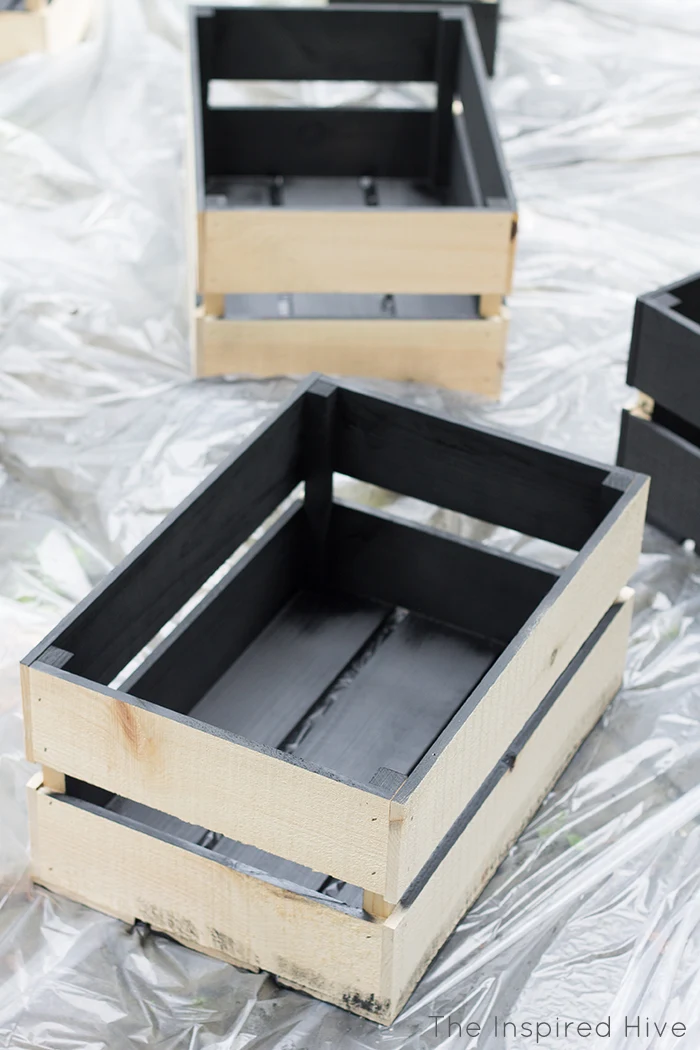
I started with Walnut Hollow's rustic wooden crates:I painted them with a flat black paint. I actually started out with a can of paint and a paint brush, but after finishing one crate, I realized it was going to take wayyyyy too long to get into all of the nooks and crannies with a brush! I'm all about quick and easy! So, back to the store I went! It took three cans of
Rustoleum's flat black 2x spray paint and about an hour to cover all 8 crates.
I let them dry thoroughly and then went back and touched up a few areas, but for the most part it was easy to get good coverage with one coat of spray paint!
Next came the labels!!!!! (Can you tell I'm excited about these?!)
Using a utility knife, my husband and I cut them lengthwise. The slats are made with soft wood, so they are fairly easy to cut. After cutting, I smoothed the cut edges with 120-grit sandpaper and gave them all a coat of my absolute favorite wood stain.
Be sure to allow the stain to dry completely before using the wood burning tool. We don't want any fires!
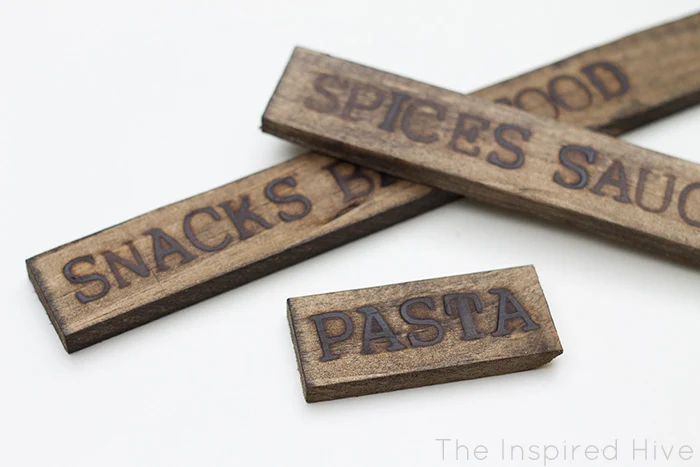
Next, I wrote out a list of label names to keep the pantry organized and got my HotStamps letters ready.
Then I burned the label names onto my stained wood slats. The HotStamps letters make it so easy! They screwed right into my wood burning tool and work with any of Walnut Hollow's other wood burning tools.
I used a scrap piece of wood to test how long to hold the letters against the wood once hot. I found that 15-20 seconds seemed to work best for me.
To change out the letters each time, I turned off the wood burning tool, used my multi-tool to remove the hot letter and screw the next letter in, and quickly turned the wood burning tool back on. This process helped me move through each word fairly quickly and kept me from getting burned. I definitely suggest using pliers or a multi-tool for removing the letters!
After burning all of the words onto the slats, we used the utility knife to cut between each word, sanded the cut edge, and touched up the stain on that side with an old cloth. I found it easier to cut them after burning rather than trying to estimate how long each word would be in order to cut ahead of time.
To attach my new wood burned labels, I added 2-3 small spots of super glue to the back and held them in position on the crate for a few seconds. By using only a few dots, I can easily pry the labels off later if I find I need a different category... for instance, I won't need one that says "baby food" forever ;)
And here they are! I can't get over how perfectly they fulfilled the vision in my head!!! And as tough as the whole laundry/pantry build has been, this was the easiest and most fun part!
I don't want to show you too much until I can share the full pantry reveal with you... but here's one more little peek...
Check back in the next few weeks to see the full reveal with all of the crates included and more! :)

Shop this post:


SUCH a cool project Nicole!! I love the idea of having letters to work with, instead of trying to write it with the tool yourself! Can't wait to see the full pantry :)
ReplyDeleteThese are so stinkin' cute, Nicole! How cool is that wood burning tool?! I can't wait to see the rest of the space!
ReplyDeleteThis is the cutest look! Love this idea!
ReplyDeleteWhat a great idea! SUCH a pretty take on labelling!
ReplyDelete