The quickest way to update a weathered fence
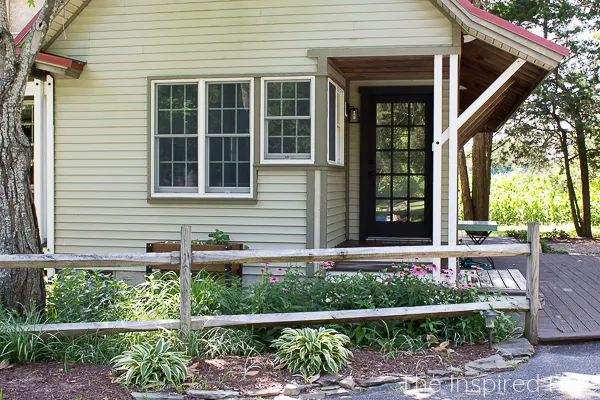
When we moved into our home, there was an old weathered split rail fence around most of the property and along the front garden. We loved the character and charm it added to our old farmhouse's property, but unfortunately it wasn't a safe option for keeping our toddlers from accidentally running out onto the 50 mph road in front of our house, so we replaced most of it with a gated picket fence shortly after moving in. However, we did choose to leave the decorative section of split rail fence in front of the garden.
This post is sponsored by Wagner Spray Tech. This post contains affiliate links for your convenience. For more information, see my disclosure policy.
You might also love...
- How to spray paint a picket fence
- Modern traditional patio design plans
- 15 Reasons to own a small power washer
- The easiest way to update your front porch
A split rail fence can last a really long time if well taken care of. They are usually made of weather resistant cedar.
The texture and shape of the wood gives an aged country feel whether its a brand new fence, freshly stained, or old and weathered. Perfect charm for an older home or rural property!
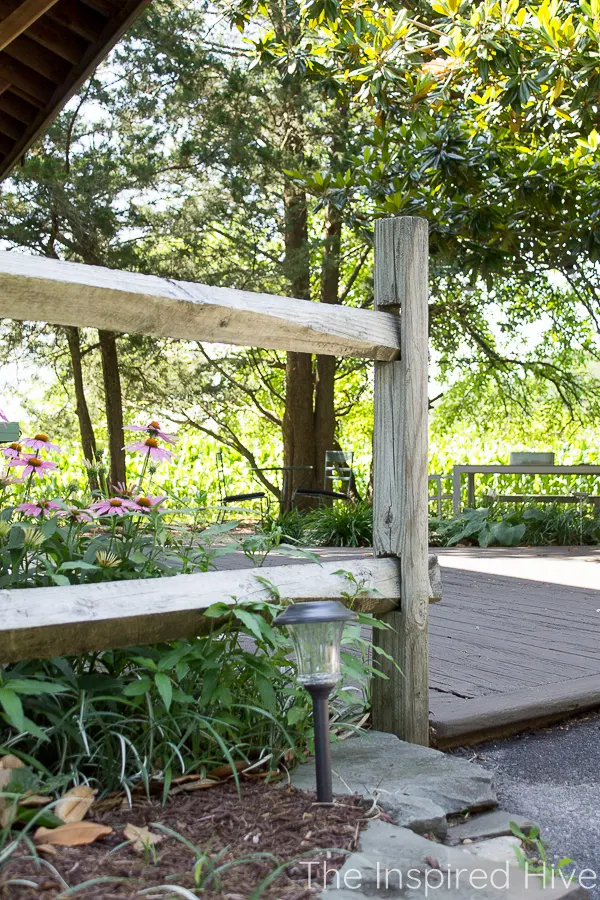
The small decorative section of fencing in front of our garden is overall in good shape, but very weathered and gray. We decided to give it a good cleaning and and apply a warm toned stain. This would not only add a little depth and contrast against our light colored siding, but it will also add some protection to help our fence last longer.
With the right equipment, staining a split rail fence is quick and easy! Here's how we tackled this project.
Materials
- Pressure washer
- Pressure washer soap
- Wagner Spray Tech FLEXiO 3000 sprayer
- 2 quarts of oil based stain
- Saw horses
- Cardboard or plastic drop cloths for protecting plants or areas that shouldn't be stained
- Stain cloth for wiping up drips and excess stain
- Mask
How to stain a fence with a sprayer
Before applying stain, it's important to clean the surface. Dirt and debris will prevent an even finish.I used our small pressure washer and soap to clean the fence. Be sure to use the least powerful nozzle and don't get too close to the wood. Cedar will easily splinter and need to be sanded if you use too much power.
Allow the fence to dry for 24 to 48 hours after pressure washing.
Next, prepare your sprayer. Using a sprayer is the fastest way to stain your fence! For this project, I used the FLEXiO 3000.
I love that the FLEXiO 3000 comes with a handy case for keeping all of the parts together. It also has both a detail finish nozzle for thinner materials and finer finishes and the iSpray nozzle which is capable of spraying unthinned materials (life changing! 🙌).
Since I was using a thin material (stain) and was spraying slim fence rails, I opted to use the detail finish nozzle for this project.
Mix your stain thoroughly and then pour it into the cup. Lesson learned, next time I'm working with stain, I will use a funnel for pouring! I made a bit of a mess!
I like to test my spray settings on a piece of scrap wood or cardboard before beginning. You can adjust the amount of flow and spray pattern. I recommend starting at the lowest setting and gradually increasing until you get the desired flow.
Since this is a split rail fence, I decided to remove the rails and put them on saw horses in order to minimize stain getting on our flower bed. You could also use a large plastic drop cloth to protect plants. If your fence isn't near any plants, it's fine to leave the rails in place.
When spraying stain, I recommend wearing a mask. We live in a coastal area, so it is always windy, meaning there is always a little overspray even with proper settings. A mask will protect you from overspray and fumes.
I stained one side of the rails on the saw horses using a continuous spray across the long boards to get even coverage.
The wood will absorb the stain very quickly, so you likely won't need to wipe excess stain, but have a cloth handy just in case.
While the first side of the rails was soaking in, I stained the posts. First I put pieces of cardboard around the base of the posts to protect the driveway and deck.
I sprayed the post starting at the top and working my way to the bottom.
In our case, the posts absorbed even more stain than the rails did. They turned out a little bit darker and less even. I assume this is because they weathered differently in the sun. When the stain needs to be reapplied in a few years, I think I will try sanding the posts first to get a more consistent color.
After spraying all of the posts, I went back to the rails. I flipped them over and sprayed the other sides.
Once everything dried, we put the fence back together and freshened up the landscaping. We planted some hosta roots last year but a few of them did not grow. We will try again this year so that we have more even spacing. In the mean time, a fresh layer of mulch and the beautiful coneflowers and black eyed susans in bloom all summer long is looking pretty good!
I love the difference a fresh coat of stain made! Our exterior was looking pretty drab, but now the fence pops a little bit and the character is more noticeable.
Staining the fence was quick and easy! You can see the picket fence we installed in the background. We'll be staining that one this fall! It's a much larger fence, so it will probably take us several weekends to do, but a sprayer will definitely save us a lot of time on such a large project! And just look at the difference stain makes! I can't wait to tackle it!


Looks great! What color stain did you all use?
ReplyDelete