I recently shared the design plans for my son, Cade's nautical bathroom. One of the things I wanted to incorporate into the design was a faux shiplap wall behind the mirror and vanity. I had never made a shiplap or plank wall before, but I knew the usual method was having a home improvement store rip plywood down into strips for you. However, I had also heard several people complain about the pieces not being cut evenly or straight, so I decided we might as well try to do it ourselves. How hard could it be?
My husband and I were a little nervous about not being able to cut the planks straight, but it turned out to be really easy, and I am so happy with the results! It was also fun to learn something new! :)
- How to install a thin shiplap feature wall
- Vintage schoolhouse playroom with shiplap
- 10 Bathrooms with shiplap
- Where to buy skinnylap
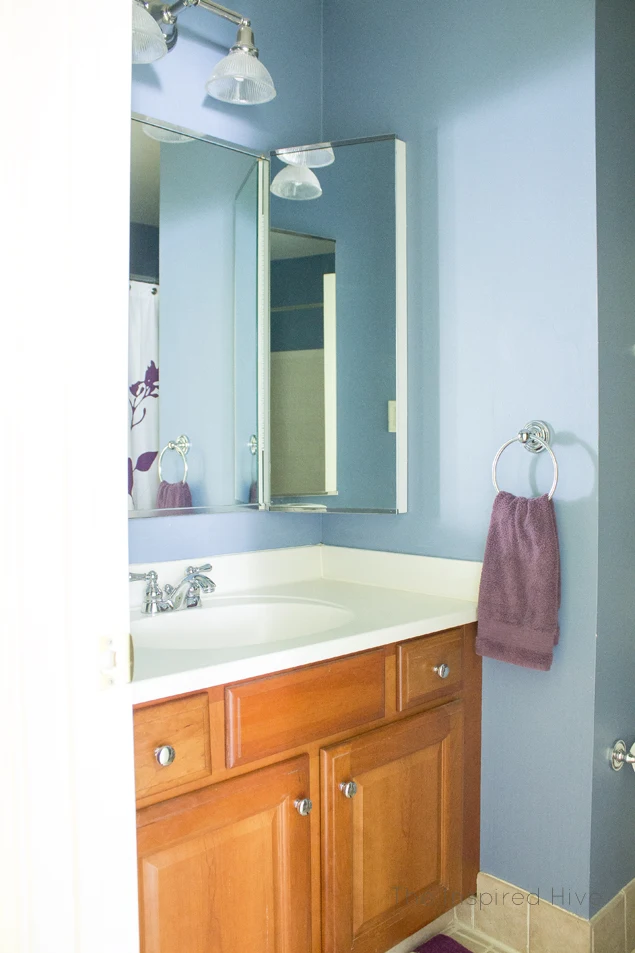
First, let me show you Cade's bathroom before we got started. When we moved into our home three years ago, the walls were blue (Ah! Has it been three years?! How did I ignore the blue for so long?!). The bathroom set we registered for as wedding gifts was a purple floral design, so this bathroom has been rockin' blue and purple for a while. So lovely, I know ;)
(It was super tough to take pictures of this small dark room, but hopefully you can get the idea!)
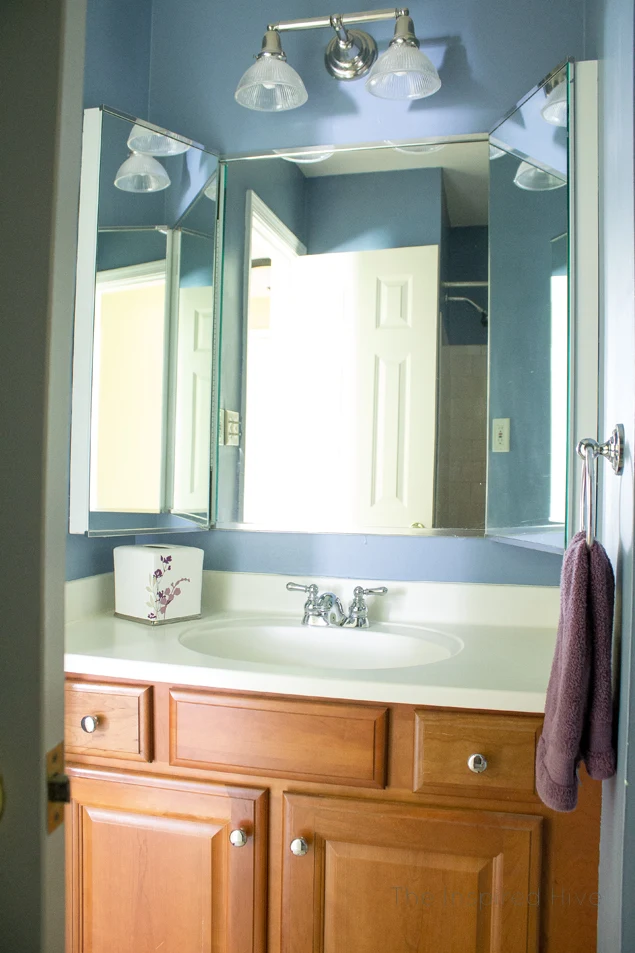
And the area to be tackled by shiplap...
Those angled mirrors have got to go!
Alright, now let's get to work!
Materials:
-straight edge (we used a carpenter's square)
How to cut your own boards for a shiplap wall:
First, we went to Home Depot and bought a few small sheets of 1/4 inch thick plywood. They sell small 2 foot x 4 foot and 4 foot by 4 foot sheets which make it easy to fit them into the car without having to be cut down in store.
We decided to make our planks about 6 inches tall, so we used our straight edge to measure six inches and create a straight line. Remember that you need to account for the width of the circular saw blade. We chose to measure and mark the plywood after each cut to ensure even widths rather than trying to measure so precisely and marking all of the cuts in advance.
Once we had our cut line marked, we clamped our straight edge to the board. We held the circular saw up to the line with the saw blade aligned, and then we aligned the straight edge against where the base plate of the saw would be.
We didn't have any saw horses, so we propped the plywood up off of the floor with some scrap pieces of wood. The important thing is to make sure that you have plenty of clearance for the saw below the plywood without hitting the ground.
Next, it was time to start cutting! Be sure to wear safety glasses (these are the glasses I am wearing) and closed toe shoes for protection! I lined up the circular saw blade with the cut line we drew and the side of the saw's base plate with the straight edge. I turned on the saw and moved the saw with the base plate pushing lightly against the straight edge. Tah dah! Nice straight, perfectly cut boards!
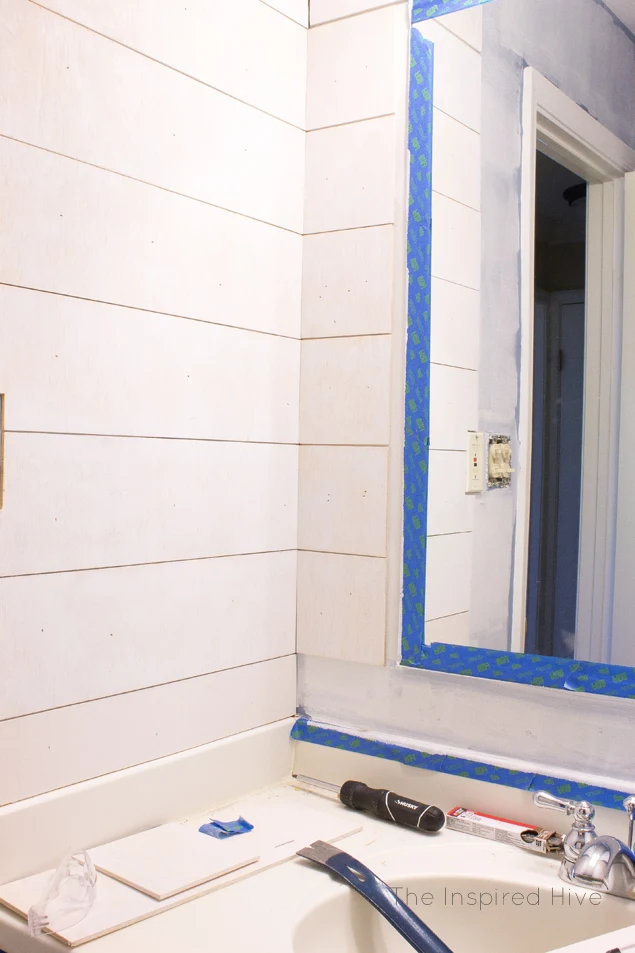
After cutting all of the plywood down to six inch wide strips, we measured and cut the appropriate lengths to fit our bathroom wall. I was hoping to keep the existing mirror, which was just a big plain rectangular mirror (once the angled side cabinets were removed), so we cut small planks to fit around it with a plan to frame it out at the end.
Ready to install?
How to install a shiplap wall in a bathroom:
When we removed the angled side mirrors, there was a lot of damage behind them that was beyond repair without replacing the drywall, so we decided to cover it up by planking the side walls too. It turned out to be a blessing in disguise because we both love how planking the entire sink nook turned out!
First, I primed those blue walls with white primer. This was just preventative because I was worried about the blue paint showing through the gaps in the faux shiplap. If your walls are white or a light color, you can skip this step!
We gave all of the planks a quick coat of spray primer so that the edges would be white (way easier than hand brushing all those tiny edges) and so that the paint would show less of the knots and grain (but if that’s the look you’re going for, you can totally skip the primer!).
We started installing planks level with the bottom and top of the mirror leaving shorter sections at the top and bottom of the wall to be measured and cut after everything else was installed. Since the mirror is eye level, we felt it made the most sense to base all of our lines and measurements on the location of the mirror.
Wherever you start, make sure the first board you attach is level because everything you do after the first one is dependent on that one. (If you’re
To space our planks we used nickels. Our boards were short enough in length that we only needed to use two nickels, one on each side. We installed one board, held up the next board, put the two nickels in place, adjusted the second board, and installed. Repeat, repeat, repeat! :)
We used our RYOBI Airstrike brad nailer to install the planks. I had never used any kind of nail gun before, so I was a little intimidated, but this thing was so easy to use and worked so smoothly! I never thought I could be in love with a power tool, but I plan on using this one for everything from now on! (My husband and I both said something along the lines of “how on Earth did we suffer through the laundry room trim and moldings without this thing?! NEVER AGAIN!”). Best-tool-ever.
Seriously. All you do is push down against the plank and pull the trigger. Bam. Quick and easy.
There were some areas right over where the electrical wires ran across the wall for the light fixture that we opted to use an adhesive instead because we didn’t want to risk shooting a nail into the wiring and having a house fire. Safety first! I wouldn’t recommend doing this to the whole wall because a) it’s much more time consuming than the brad nailer and b) it would suck majorly if you ever wanted to remove your plank wall. But for any risky areas, adhesives or glues are an option.
Once all of the planks were up, I patched all of the nail holes with wood filler. It’s sandable after 15 minutes, so then I took some fine grit sandpaper to smooth the wood filler out.
I also used wood filler in between the long boards above the mirror to make it look like one long board instead of two short boards. That part required a couple of rounds of filling and sanding before they looked smooth.
Then, I gave all of the boards two coats of paint using Sherwin Williams “Zurich White” which is my favorite trim color!
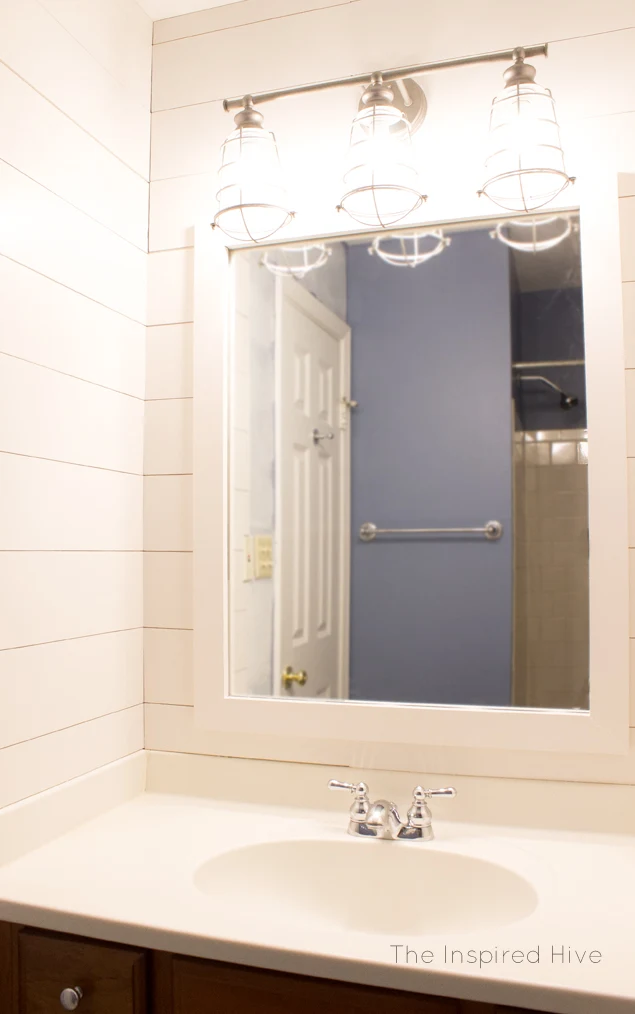
Then, all that was left to do was frame out the mirror and install our new light fixture!
We cut some 1” x 3”s to fit our mirror and mitered the corners with a hand saw and miter box. We primed and painted them, and then installed them around the mirror using the brad nailer. We hid about a half inch of the mirror all the way around. Then, again, we filled the holes with wood filler and I touched up the paint with a brush.
We installed our new Ajax light fixture from 1STOPLighting which totally pulls the space together.
I’m so in love with how the light pops in front of the new faux shiplap wall. I can’t wait to tackle the rest of the details for this bathroom!
Shop this post:
Pin it for later!









No comments
Post a Comment